How to Choose Pillow Cover Seam Types for Strength and a Clean Finish
Last updated: November 19, 2026
Quick answer: for most small covers, start with a 1/2-inch seam allowance, then choose french seams for a very tidy inside, overlock seams for speed and fray control, topstitching for a crisp edge, and plain seams only when the fabric will not ravel badly. In the topic of how to choose pillow cover seam types for strength and a clean finish, the right choice depends on how the pillow will be used, how much strain the seam will take, and how neat you want the inside and outside to look.
Key takeaways
- A seam is not just a join line; it changes strength, edge finish, and how the inside of the cover looks.
- French seams hide raw edges, but they add bulk and take more time.
- Overlock seams are fast and clean on the inside, yet they rely on the machine and can look more utilitarian.
- Topstitching helps hold seams flat and gives a sharper edge, especially on decorative pieces.
- Seam allowance matters as much as seam type, because too little allowance weakens the join.
What does a pillow cover seam need to do?
A pillow cover seam needs to hold the shape, keep raw edges under control, and still sit flat enough to look clean on the finished piece. That is why seam choice matters as much as fabric choice, even on something as simple as a 16-inch or 18-inch cover.
Therefore, start by deciding which job comes first: strength, appearance, or speed. If the cover will be opened and closed often, or if the fabric is loose-woven and likely to fray, edge finish matters more than on a stable cotton weave. A plain seam can be fine on sturdy fabric, but a french seam or overlock seam gives better edge control.
Because of that, think about the inside as well as the outside. A cover that looks neat on the front but sheds threads inside will age badly after a few wash cycles. The seam should also fit the design: a bulky edge can distort a snug envelope back or make corners look thick and lumpy.
If you are choosing for a v-shaped pillow cover, that balance matters even more because the shape draws attention to the edge line. The hub on pillow cover materials and construction goes deeper into fabric and build choices; this page stays with the seam itself.
Which seam types should you compare first?
The four seam types worth comparing first are plain seam, french seam, overlock seam, and topstitching. Binding belongs in the comparison too when you want a decorative edge or extra reinforcement.
| Seam type | Best for | Strength | Clean finish | Trade-off |
|---|---|---|---|---|
| Plain seam | Simple construction on stable fabric | Moderate | Basic | Raw edges need another finish if fraying is a risk |
| French seam | Neat inside on light to medium fabrics | Good | Very clean | More steps and more bulk |
| Overlock seam | Fast sewing and fray control | Good | Clean, practical inside | Needs the right machine setup |
| Topstitching | Flat seams and visible detail | Adds support | Crisp, decorative edge | Shows on the outside, so stitch quality matters |
| Binding | Decorative edge or protected raw edge | Good when applied well | Very polished | Adds thickness and extra work |
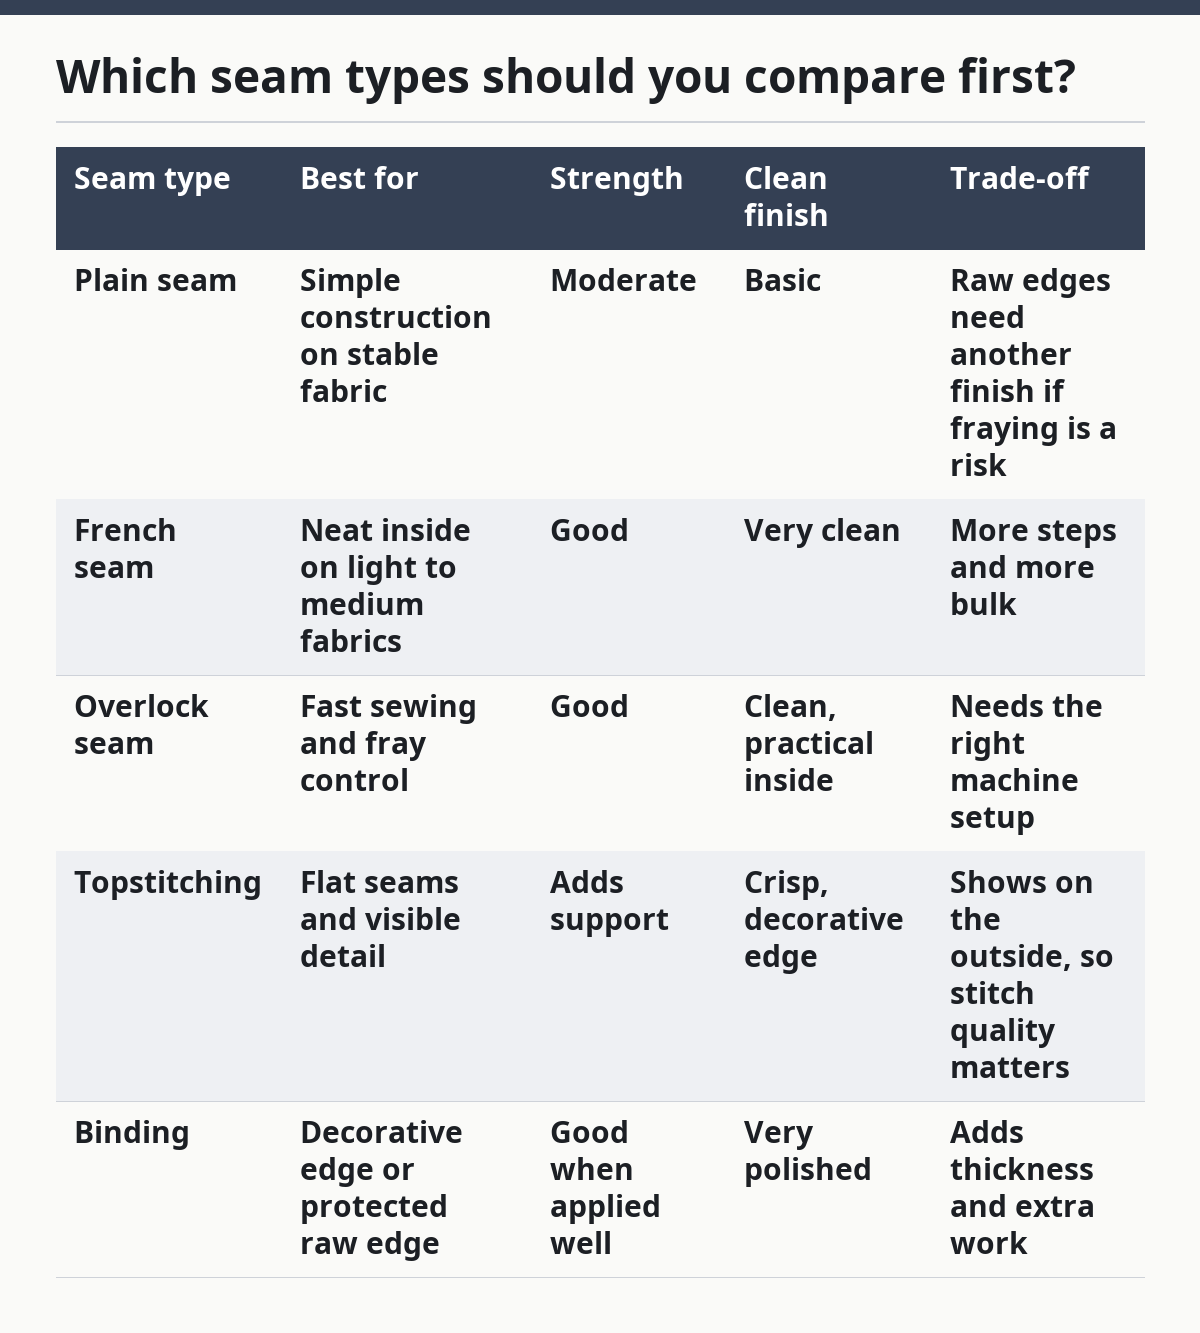
This is the basic decision: pick plain seams only when the fabric is stable and the look is simple; pick french seams when the inside must look finished; pick overlock seams when you want speed and edge control; add topstitching when you want the seam to stay flatter or the outside line to stand out. Binding is the strongest visual finish of the group, but it is not the lightest. For a general overview of seam finishes, see the University of Nebraska–Lincoln Extension on sewing construction basics and the Threads guide to seam finishes. University of Nebraska–Lincoln Extension Threads.
A generic guide often treats all seams as interchangeable, but a sewing professional would not. A french seam hides the raw edge inside the seam itself, while an overlock seam trims and wraps the edge with thread at the same time. Plain seams leave the edge to be finished later, if it needs finishing at all. If you are unsure, consult a sewing professional or test a sample first; the right finish depends on the fabric and the intended use.
How do you choose the right seam for strength and a clean finish?
Choose the seam by matching fabric behavior to the result you want, then build in enough seam allowance to support it. A seam allowance of 1/2 inch is a common practical benchmark for small sewn covers because it leaves room to stitch, trim, and finish without crowding the edge.
- Check how much the fabric frays. If the weave sheds threads easily, avoid a plain seam with no edge finish. The result should be a seam that does not unravel after handling or washing.
- Decide how visible the inside will be. If the inside may be seen when the cover is removed, choose a french seam or overlock seam. The result should be a cleaner interior and fewer loose threads.
- Measure the seam allowance before cutting. Leave enough room for the chosen finish, often 1/2 inch or more depending on the method. The result should be enough fabric to grip without weakening the join.
- Choose the stitch line for the look you want. Topstitching sits on the outside and makes a sharp line; a hidden seam keeps the surface calm. The result should match the style of the cover, not fight it.
- Press the seam flat as you go. Even a good seam can look messy if it is not pressed. The result should be a flatter edge and fewer puckers.
- Reinforce stress points if the cover opens and closes often. A second line of stitching near a closure or corner can help. The result should be a seam that stands up to repeated use.
For strength, the biggest mistake is choosing a finish that looks neat but leaves too little fabric for the seam to hold. For finish quality, the biggest mistake is using a sturdy seam method on a thick fabric and then skipping pressing, which makes the edge look heavy and uneven. The University of Nebraska–Lincoln Extension and Threads both note that seam finish choice depends on fabric behavior, not just appearance. University of Nebraska–Lincoln Extension Threads.
What does seam allowance change?
Seam allowance changes both durability and the look of the edge, because it gives the stitch line room to hold the fabric without crowding the fold. Too narrow an allowance can make a seam weak; too wide an allowance can add bulk, especially at corners.
On a plain seam, the allowance is what protects the join from pulling apart. On a french seam, it is even more important because the seam is sewn twice and turned inside out, so there must be enough room for both passes. On a v-shaped pillow cover, tight corners can become bulky fast if the allowance is too generous for the fabric weight.
The number itself is not the whole story. A 1/4-inch allowance may work for a very light edge treatment, but it gives less margin for error, so consult a sewing professional or test a sample first. A 1/2-inch allowance gives more room for a neat finish and is easier to manage for many home sewing jobs. Wider allowances can help on thick fabric, but they can also make the seam ridge more obvious on the right side.
A useful rule is simple: the heavier the fabric and the more visible the edge, the more carefully the allowance should be planned. If you are using topstitching, the allowance must also stay flat enough that the visible line does not wobble. If you are using binding, the allowance has to account for the added thickness at the edge. For a standard reference on seam allowances, see the Sewing Machine Fun guide and the University of Nebraska–Lincoln Extension. Sewing Machine Fun University of Nebraska–Lincoln Extension.
How do you keep the inside looking neat?
Keep the inside neat by finishing raw edges before they can fray and by choosing a seam that tucks the rough edge away. French seams do this by enclosing the raw edge completely, while overlock seams wrap the edge with thread and trim excess fabric at the same time.
Turning the cover inside out is part of that process, not an afterthought. The seam is usually sewn on the wrong side first, then the piece is turned so the raw edge is enclosed or wrapped. This matters because the clean result depends on the seam being built in the right order, not patched later.
Topstitching also helps because it presses the seam allowance to one side and locks it there. That makes the edge read as intentional instead of loose. Binding goes one step further by covering the edge with another strip of fabric, which gives a crisp, finished look but adds bulk around corners and seams. Threads and the Craft Industry Alliance both describe these finishes as control methods for raw edges and seam stability. Threads Craft Industry Alliance.
If the goal is a polished interior that can be shown off, french seams are the cleanest option of the group. If the goal is fast construction with good edge control, overlock seams do the job with less fuss. A plain seam is only tidy if the fabric does not fray much or if you add another finish after stitching.
When should you use topstitching or binding?
Use topstitching when you want the seam to stay flat and show a deliberate line on the outside, and use binding when you want the edge to become part of the design. Topstitching is the lighter option; binding is the more decorative and more built-up one.
Topstitching works well when the seam is already sound but needs more structure. One line close to the seam edge can hold the fabric flat and make the cover look sharper. It also helps on corners and borders where a soft fold might puff outward.
Binding is better when the edge itself is the feature. It covers the raw edge and can echo another fabric in the room, which is useful on statement pieces. The drawback is thickness. Binding can make a slim seam feel heavy, and on a pillow that needs soft edges, that weight can be too much.
This is why a one-size-fits-all answer fails. A decorative cover that will be handled often may need both a neat inside and a visible edge treatment, so it is wise to consult a sewing professional if you are unsure. A plain utility cover may only need an overlock seam and a careful press. The right choice depends on whether the seam should disappear or be seen.
Which seam is wrong for your project?
The wrong seam is the one that fights the fabric, the finish, or the amount of time you want to spend. A french seam is a poor choice for thick fabric because the extra fold creates bulk. A plain seam is a poor choice for fabric that frays hard unless you add another finish.
Overlock seams are usually not the best answer if you want a very tailored, old-world look on the outside. They are practical, not delicate. Binding is also not ideal if the goal is a thin edge with minimal build-up, because it adds thickness fast.
If you want the shortest decision rule, use this: stable fabric and simple look, plain seam with finishing as needed; neat inside and light fabric, french seam; fast and tidy edge control, overlock seam; crisp decorative line, topstitching; edged feature or extra protection, binding. That rule covers most buying and design choices without pretending one seam is best for everything.
Which seam type is strongest for a pillow cover?
The strongest seam is the one that matches the fabric and keeps the edge from fraying, not just the one that looks heavy. For many pillow covers, an overlock seam or a well-made french seam gives a better balance of strength and edge control than a plain seam with no finish.
A plain seam can still be strong on stable fabric, but it depends on the raw edge not breaking down. If the fabric frays, the seam can fail sooner at the edge even if the stitch line itself is fine. A reinforced seam with enough allowance is usually a better bet than a narrow seam that looks tidy but has no margin.
Which seam type looks the neatest on a pillow cover?
A french seam usually looks the neatest because it encloses the raw edge and leaves the inside clean. That makes it a strong choice when the cover may be removed, handled, or inspected.
If the cleanest look means the outside line matters most, topstitching can also look sharp because it gives a controlled, straight edge. The best answer depends on whether the eye sees first the inside finish, the outside stitch line, or both.
Drafted with AI; not yet reviewed by a person.
About the Author