How to Tell Whether a Pillow Cover Has Reinforced Stress Points
Last updated: November 19, 2026
Quick answer: a pillow cover has reinforced stress points when at least 3 visible clues show up at the places that take the most pull — usually the zipper ends, corners, and opening edges. In plain terms, this guide to How to Tell Whether a Pillow Cover Has Reinforced Stress Points is about checking whether those high-stress areas show extra stitching, tighter seam construction, or extra fabric support. If those areas look thin, loose, or unfinished in photos, the weak point is probably still there.
Key takeaways
- Reinforcement is about the places that fail first, not just the main seam.
- Look for bar tacks, double stitching, and extra seam allowance around openings and corners.
- Zipper tape and zipper ends matter as much as the visible seam.
- A neat outside seam can still hide a weak inside finish; if the inside is not shown, consult a professional or ask the seller for a close-up before buying.
- Product photos tell you more when you zoom in on the edge, not the center panel.
What counts as a reinforced stress point?
A reinforced stress point is a small area built to handle repeated pulling, bending, or snagging. On a pillow cover, that usually means the corners, the seam beside the opening, the zipper ends, and any place where fabric changes direction by 90 degrees.
The plain signs are practical, not decorative. A reinforced spot often has a bar tack, which is a short, dense line of stitches used to stop tearing. It may also have double stitching, where two parallel rows of stitching run close together, or a wider seam allowance that gives the edge more fabric before the stitch line reaches the raw edge. For general construction terms, sewing references from the American Sewing Guild and manufacturer guides can help decode the wording, though the listing itself still matters most. American Sewing Guild and SINGER.
This is not the same as “looks well made.” A smooth front panel can still hide a weak opening edge. A cover with a hidden zipper and no visible reinforcement at the ends may fail where the zipper stops, even if the rest of the seam looks tidy. That is why the stress point matters more than the fabric print.
For a reader comparing construction choices, the main question is simple: does the build spread force out, or does it concentrate force into one thin line? The answer usually appears in the details that sit 1 to 2 cm from the edge.
Where does a pillow cover usually fail first?
A pillow cover usually fails first at the opening edge, the zipper ends, or the inside corner where the fabric turns and gets pulled every time the insert goes in or out. Those spots take the most strain from fingers, stuffing, and repeated opening.
The weakest areas are rarely the middle of the panel. The middle moves with the pillow but does not get pinched the same way. By contrast, the seam beside a zipper has to resist both tension and the hard stop at the end of the zipper tape. If that end has no bar tack or backstitch lock, the stitching can start to separate at one point and then creep along the seam.
Corner seams can fail in a different way. If the seam allowance is narrow and the corner is clipped too aggressively, the thread line sits too close to the turn and can fray. A stronger corner usually leaves enough fabric to turn cleanly and still keep the stitch line away from the edge.
Here is a simple comparison of what usually helps and what usually does not:
| Feature | What it suggests | What to watch for |
|---|---|---|
| Bar tack at zipper end | Extra lock at a high-stress stop | Should sit right where the zipper ends, not far away |
| Double stitching | More hold along a seam | Two lines should be even and close, not loose or wandering |
| Corner reinforcement | Better support at a turn | Look for extra fabric or neat stitching at the point |
| Wide seam allowance | More fabric before the edge | Useful only if the stitch line is not too close to the raw edge |
| Plain single seam | Simpler construction | Can be fine for light use, but weaker at repeated stress |
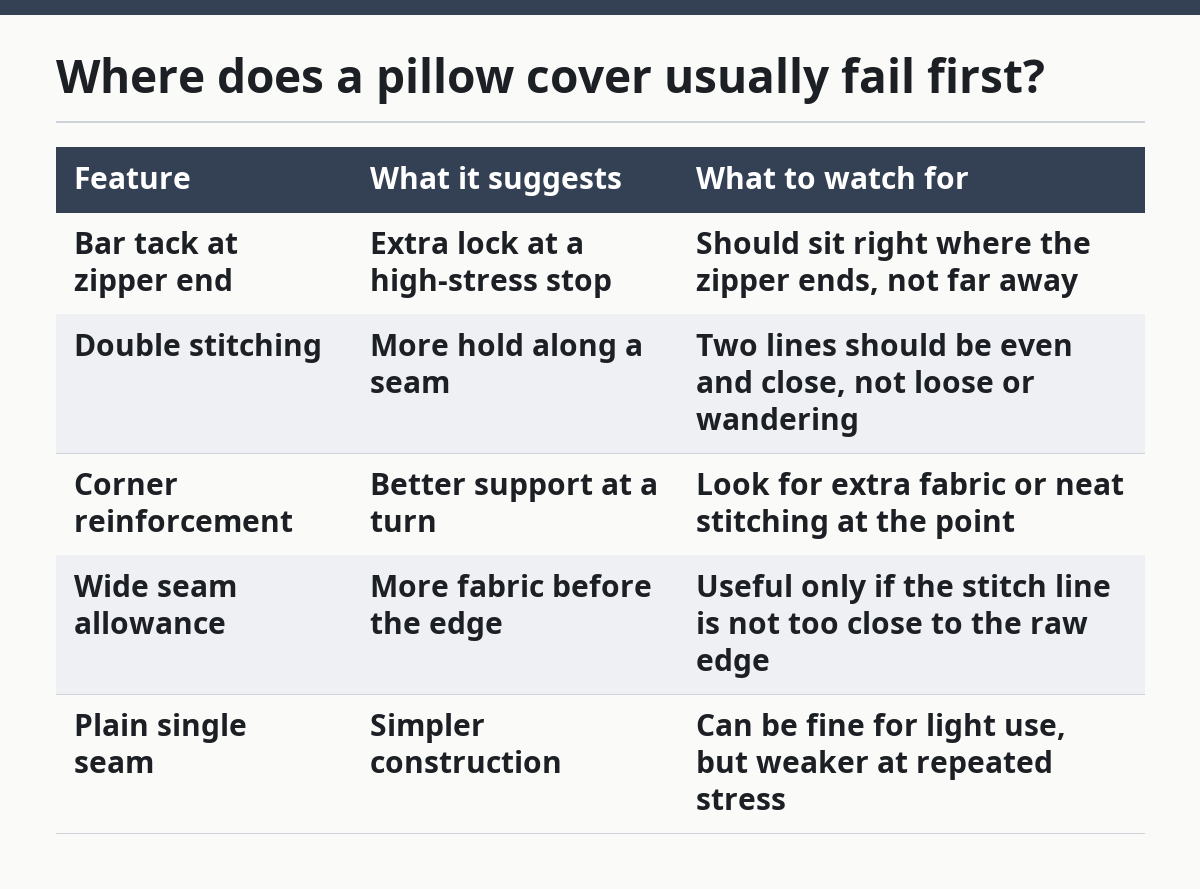
A strong signal is not just “more stitches.” It is “stitches where the pull happens.” That is the difference between a decorative finish and a real reinforcement.
How can you spot reinforced seams in product photos?
You can spot reinforced seams in product photos by zooming in on the opening, the zipper ends, and the corners, then checking whether the stitch work looks denser and more deliberate than the rest of the edge.
Use a quick three-step check:
- Find the opening edge first. Look at the side with the closure, not the center panel. A reinforced edge usually shows a denser stitch line, a folded tape edge, or a visible second row of stitching within about 1 cm of the seam.
- Check the zipper ends. If the listing photo is close enough, see whether the zipper tape stops cleanly and whether there is a bar tack or tight backstitch at each end. A loose end with a thin run of stitching is a weak sign.
- Inspect the corners at full zoom. Corners should look crisp but not strained. If the stitch line cuts too close to the turn, or if the seam allowance looks tiny, the corner may be more likely to open up later.
Do not rely on the front image alone. Many listings photograph the center of the textile because it looks cleanest. The part that matters is often off to the side or hidden in a close-up. A useful photo set will show both the outside finish and the inside edge, especially where the opening meets the corner.
If the image is too small to show thread density, look for clues in the construction language instead of guessing from the print. “Double stitched,” “bar-tacked,” “reinforced zipper ends,” and “finished seam allowance” all point toward stress-point reinforcement, while vague wording such as “quality made” tells you very little.
What details in a listing description matter most?
The details that matter most are the ones that name the seam structure, the zipper build, and the edge finish, because those are the parts most tied to stress-point reinforcement.
A good listing usually gives concrete construction words, not just style words. “Invisible zipper” tells you the closure type, but it does not tell you whether the zipper ends are locked. “Double stitching on the opening” is more useful because it names the exact place where strain lands. “Seam allowance” matters too, because a wider allowance can give the edge more tolerance before the fabric frays.
The phrase “corner reinforcement” is worth noticing when it is used precisely. It should refer to the corner seam itself, not just to general durability. The same goes for “bar tack.” In sewing terms, a bar tack is a short dense reinforcement stitch, often placed where a seam needs a hard stop. If a listing uses the term, it should be describing a specific stress point, not a vague promise of strength.
A description that only says “durable” or “high quality” may still hide weak edges. That is a limitation worth stating plainly. Some sellers write around the parts that matter because those details are harder to photograph and easier to skip. When the listing stays general, the safest reading is to treat the stress points as unproven unless the photos or copy show them clearly.
A second limitation: a heavy-looking fabric does not guarantee reinforced construction. A thick textile can still split at a weak zipper end if the seam work is light. Construction and material are related, but they are not the same thing.
Which reinforcement signs are worth more than others?
The most useful signs are bar tacks, double stitching, and a generous seam allowance at the opening, because those features directly support the spots that take the most pull.
Not every sign carries the same weight. A decorative topstitch can make a piece look finished without adding much to the weak point. A neat hem on the outside also does not prove the zipper end is secure; if the listing does not show the inside finish, consult a professional or ask the seller for a close-up before you judge the build. On the other hand, a bar tack at the zipper stop is a strong clue because it puts dense thread exactly where tearing often starts.
Double stitching matters when it is placed along the opening edge or around a corner. Two rows of stitches can spread load better than one, especially if the lines are straight and tight. If the lines wander or sit too close to the raw edge, the benefit drops fast.
A table makes the trade-off clearer:
| Reinforcement sign | Strong clue? | Why it matters |
|---|---|---|
| Bar tack | Yes | Locks the end of a seam or zipper stop |
| Double stitching | Often yes | Adds another line of hold along a stress path |
| Corner reinforcement | Yes | Helps the seam survive sharp turns |
| Wide seam allowance | Sometimes | Gives the edge more fabric to resist fray |
| Decorative stitching only | No | May look finished without adding much strength |
The biggest mistake is treating any extra stitching as proof of durability. Extra stitches placed in the wrong spot can help appearance more than function. A true stress-point fix shows intention: the maker reinforced the exact area that gets pulled, bent, or opened repeatedly.
If the description mentions a standard or a sewing term, that is usually better than vague marketing language. For general sewing construction terms, references from organizations such as the American Sewing Guild or manufacturer sewing guides can help a reader decode the wording, though the listing itself still matters more than the label.
What should you do if the photos are unclear?
If the photos are unclear, treat the construction as unknown and compare only the details the seller actually shows, such as the zipper end, the seam line, and the inside edge.
A blurry close-up is not enough to confirm reinforcement. The safest reading is that the claim remains unproven unless the stress point is visible. That may sound strict, but it keeps the reader from assuming strength based on a styled image.
The practical move is to look for three things in the available images: a visible second row of stitching near the opening, a clean finish at the zipper stop, and corners that do not look pinched or overly tight. If those are missing, the cover may still be fine for light use, but it is not the piece to choose if repeated opening and closing is the priority.
This is where the page on pillow cover materials and construction fits best as the broader context. That guide covers the bigger build choices; this one is about the weak points that show up first.
A final caution: don’t confuse reinforcement with repair. A cover that already shows loose threads, puckering, or a split at the opening is no longer a construction question. It is a damaged item.
How do you read stress-point reinforcement quickly?
You can read stress-point reinforcement quickly by checking the opening edge, the zipper ends, and the corners in that order, then asking whether each area has extra lock, extra fabric, or both.
Use this fast scan when you only have a minute:
- Look at the opening. If the seam beside it is single and thin, that is a weak sign.
- Look at the zipper ends. If there is no bar tack or tight backstitch, note the gap.
- Look at the corners. If the seam allowance seems tiny or the fabric turns too sharply, expect more strain there.
- Compare the same feature on both sides. Uneven reinforcement can mean the build was done for looks, not load.
- Judge the description against the photos. If the copy says “reinforced” but the images show plain seams, trust the images first.
This quick read is useful because the strongest clues are visual and local. You do not need a full materials lesson to spot them. You only need to know where the force lands and what a reinforced stress point looks like when it is done well.
When should you be skeptical?
You should be skeptical when the listing uses general durability words, shows no close-ups of the opening, or hides the corners completely.
That does not mean the piece is bad. It means the evidence is thin. A good stress-point build can be ordinary-looking, but it should still be visible once you know where to look. If the seller only shows the front face and gives no seam detail, the claim is not strong enough to support a durability judgment.
Skepticism matters most on hidden-zipper designs, because the most important edge is often tucked away. A zipper tape can look neat from the outside while the stop itself remains lightly finished. That is why close images matter more than broad style shots.
If the goal is a pillow cover that opens and closes often, the safe choice is the one that shows its reinforcement clearly. If the goal is a decorative piece used rarely, weaker stress-point work may still be acceptable. The wrong choice is expecting heavy-duty construction from a listing that never proves it.
Where do pillow covers usually fail first?
They usually fail first at the opening edge, zipper ends, or a corner seam. Those are the spots that get repeated pulling and the sharpest bends, so they wear faster than the center panel.
If a listing gives no close view of those areas, the risk is harder to judge. A strong-looking front does not tell you much about the seam that does the real work.
How can you spot reinforced seams in a product listing?
You can spot reinforced seams by looking for bar tacks, double stitching, visible seam allowance, and close-up photos of the zipper ends and corners. Those signs matter because they show support at the points where fabric is most likely to split.
If the listing only says “durable” or “high quality,” that is too vague to trust on its own. The best proof is a clear image of the exact stress point, not a general promise.
Drafted with AI; not yet reviewed by a person.
About the Author