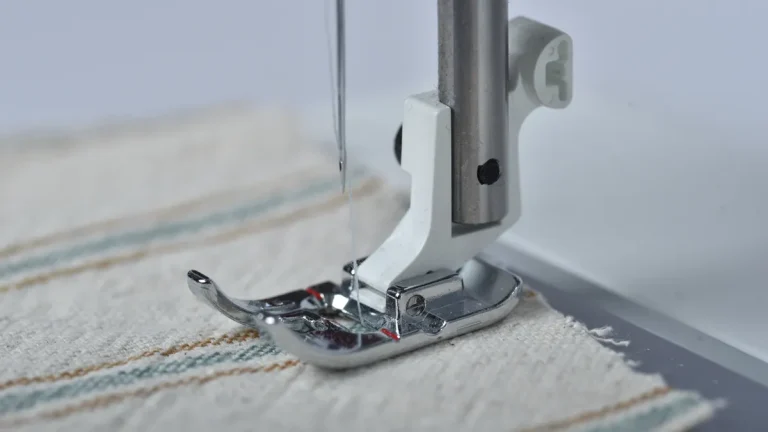
Sewing machine presser foot stitching fabric
Last updated: November 19, 2026
Quick Answer: In a 1-inch check, compare the stitch density first, then stitch length. For How to Compare Pillow Cover Stitch Density and Stitch Length, the useful question is whether the seam stays even over a 1-inch span, not whether it looks the most crowded. Stitch density tells you how many stitches sit in a short section of the stitch line, and stitch length tells you how far apart those stitches are. For a pillow cover, the tighter, more even seam is usually the better sign, but only if the thread, needlework, and seam finish also look clean.
Key takeaways
- Stitch density is the closer, more crowded seam line; stitch length is the spacing between each stitch.
- Even stitches matter more than extreme tightness, because very short stitches can stress the fabric.
- A straight, tidy seam with balanced stitch length usually signals better construction than a messy seam with tiny stitches.
- Visual checks are enough for a first pass: look at 1 to 2 inches of stitching, then compare both sides of the seam.
- This guide helps with construction clues, not with judging photos alone or deciding on seam types.
What does stitch density mean?
Stitch density is how many stitches fit into a short stretch of the seam line, and that count gives you a quick read on how carefully the seam was made. In plain terms, more stitches in the same 1 inch usually means a denser seam, while fewer stitches means a looser one.
That does not automatically make the densest seam the best seam. Very dense stitching can pucker the fabric, make the edge feel stiff, or show strain if the thread is pulling the cloth inward. A balanced seam on a pillow cover should look even, lie flat, and keep the stitch line straight across the edge.
For this kind of visual check, I would compare a 1 inch or 2 inch span of the seam on both the front and back. If the spacing changes a lot in the same line, the construction looks less controlled. The goal is not a magic number; the goal is consistency.
On a V-shaped pillow case, the seam line often has to curve and meet at angles, so density matters even more where the shape changes. If the stitches crowd too tightly at a corner, the edge can look pinched instead of clean. If they spread out too much, the seam can look thin and weak.
How does stitch length change the seam?
Stitch length changes how the seam behaves, how smooth it looks, and how much stress it puts on the fabric. Shorter stitches usually create a tighter line, while longer stitches create a looser one with more visible gaps between needle passes.
The trade-off is simple. Short stitches can strengthen the seam line, but if they are too short for the fabric, they can weaken the cloth around the needle holes. Longer stitches can look neater on some fabrics, yet they may leave the seam looking open or less controlled.
A useful way to compare two pillow covers is to look at the stitch length next to the fabric weight and the seam shape. On a thin woven fabric, extremely short stitches can leave a crowded, rough look. On a thicker or textured fabric, a slightly longer stitch can look cleaner because the seam does not fight the cloth.
This is where many generic guides can go wrong: they treat short stitches as always better. That misses the real issue, which is balance. A better stitch length is the one that keeps the seam flat, holds the edge, and does not distort the material.
If the stitch length varies a lot along the same seam, that is a sign of rushed work. Uneven spacing can show up where the machine slowed down at a curve or where the seam was restarted. A good seam keeps a steady rhythm from one end to the other.
How do I check stitch density and stitch length step by step?
You check stitch density and stitch length by measuring a short seam section, counting the stitches, and then comparing how even the spacing looks along the line. A 1 inch section is enough for a first look, and a small ruler or tape measure is all you need.
- Lay the pillow cover flat and smooth the seam with your hand. A flat surface helps you see the stitch line without shadow or bunching.
- Pick a straight part of the seam that is about 1 inch long. Avoid the corner first, because corners often compress the stitches and make the seam look tighter than it is.
- Count the stitches inside that 1 inch span. More stitches in the same space means higher stitch density, and fewer stitches means lower density.
- Look at the gaps between stitches. Even spacing suggests controlled needlework, while irregular gaps suggest inconsistent stitching.
- Check another 1 inch span near a seam end or curve. If the stitch length changes sharply, the seam may have been rushed where the shape got harder to sew.
- Run the same check on the opposite side of the seam if both sides are visible. A clean stitch line should look steady from both angles, not just from one side.
The result you want is a seam that stays even, lies flat, and keeps the stitch line straight. If the line looks crowded in one place and open in another, the construction is less controlled, even if the fabric itself looks fine. For more on the larger build of a case, the hub on pillow cover construction details and durability sits one level above this guide.
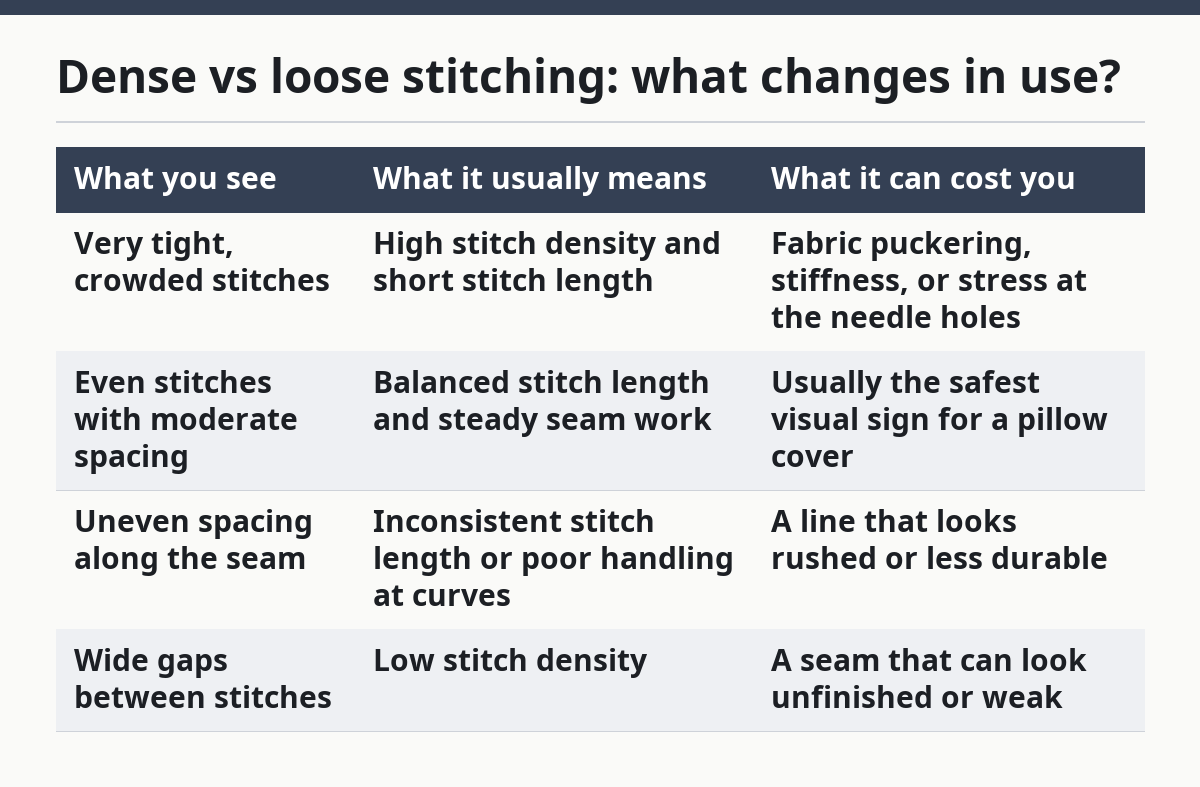
Dense vs loose stitching: what changes in use?
Dense stitching usually gives the seam a tighter look, while loose stitching usually gives it a lighter, more open look. The issue is not density alone; it is how the density works with the fabric and seam finish.
| What you see | What it usually means | What it can cost you |
|---|---|---|
| Very tight, crowded stitches | High stitch density and short stitch length | Fabric puckering, stiffness, or stress at the needle holes |
| Even stitches with moderate spacing | Balanced stitch length and steady seam work | Usually the safest visual sign for a pillow cover |
| Uneven spacing along the seam | Inconsistent stitch length or poor handling at curves | A line that looks rushed or less durable |
| Wide gaps between stitches | Low stitch density | A seam that can look unfinished or weak |
A dense seam is not automatically stronger if the thread is too fine, the seam is crooked, or the fabric is being pulled inward. A loose seam is not automatically bad if the fabric is heavy and the stitching still sits straight. The better reading comes from the whole seam line, not just the count.
This is why “tight seam” and “loose seam” are not the same thing as “good” and “bad.” A tight seam can look clean on one fabric and rough on another. A loose-looking seam can still be acceptable if it stays even and does not drift off line.
For a pillow cover, I would treat very dense stitching as a caution sign unless the seam is still flat and smooth, and I would confirm that with a professional or the maker if the item is custom or expensive. If the edge looks pinched, the needle holes are obvious, or the line waves, the extra density is not helping. A balanced seam is usually the safer choice.
What mistakes matter most?
The biggest mistakes are chasing tiny stitches, ignoring uneven spacing, and judging the seam from one angle only. Each mistake hides a real construction problem and makes the cover look better than it is.
Tiny stitches are not always a win. If the stitch length is too short, the seam can become stiff and may stress the fabric edge. For a pillow cover that gets removed, washed, and handled often, that can affect comfort and long-term shape.
Uneven spacing costs you consistency. A seam that changes from dense to loose in the same line usually means the machine or operator lost control near a turn, restart, or corner. On a V-shaped pillow case, that matters because the angled sections already ask more of the stitching.
Looking at only the front side is another common miss. The back can reveal thread loops, skipped spots, or a wavy path that the front hides. If both sides look tidy, you have a better sign that the seam was handled well.
Do not confuse decorative stitching with structural stitching. A neat topstitch can look impressive while the real seam line underneath is less tidy. The stitch line that holds the fabric together is the one that matters most for durability cues.
Which seam signs matter most for durability?
The most useful durability signs are straight stitch lines, even spacing, flat edges, and thread that does not look strained. Those clues tell you more than a single close-up of stitch density alone.
A straight seam line means the fabric was fed evenly through the machine. Flat edges mean the seam is not twisting the material or forcing a ridge along the fold. Even spacing suggests the stitch length stayed under control, which usually makes the seam easier to trust.
Thread choice matters too, even if the topic here is density and length. If the thread looks fuzzy, thin, or uneven along the line, a perfect stitch count will not save the seam. The thread should disappear into the work, not stand out as the weak point.
Needlework is part of the picture as well. Clean starts and stops matter, because a messy restart can make a section look weak even when the rest of the line is good. If one area shows a knot, a snag, or a bunch of loose thread, that section deserves extra scrutiny.
For a pillow cover, this is where the plain answer is useful: compare the seam that holds the shape, not just the visible top edge. Stitch density and stitch length are strong clues, but they work best when the whole stitch line looks controlled. For broader sewing guidance, the UK’s National Archives guide on archives and the U.S. Consumer Product Safety Commission both reinforce the value of checking construction details rather than assuming appearance alone tells the whole story.
What should I ignore when I compare stitch density?
You should ignore tiny differences that come from fabric texture, folds, or the curve of the shape, because those can make a good seam look worse than it is. A ribbed fabric, a seam near a corner, or a folded edge can all distort what your eye sees.
Do not overrate a single tight spot. A few crowded stitches at a turn are normal, especially where the seam changes direction. What matters is whether that crowding stays localized or spreads along the whole line.
Neatness is not the same thing as strength, so the seam still needs a broader check. A seam can look polished and still use a stitch length that is too loose for the job. It can also look tight and still fail the visual test because the fabric is puckered.
The safest habit is to compare like with like. Look at two seam sections of the same length, on the same piece, in the same light. If one section is clearly denser and less even than the other, that difference is worth noticing.
FAQ
Does tighter stitching mean a better pillow cover?
Tighter stitching can help, but it does not automatically mean better construction. A seam that is too dense can pucker the fabric or make the edge stiff, especially if the stitch line is crowded across 1 inch or less.
The better sign is balanced stitching that stays even and flat. A clean seam with sensible density usually tells you more than the tightest seam you can find.
How can you see stitch density in photos?
You can see stitch density in photos by zooming in on a straight section of the seam and counting the visible stitches across a short span. A 1 inch section is the easiest place to compare, because it gives you a simple frame of reference.
Look for even spacing, straight alignment, and a seam that does not pinch the fabric. If the photo is too soft, too small, or taken at an angle, the stitch line may look denser or looser than it really is.
Is stitch length more important than stitch density?
Stitch length is not more important all the time, but it often explains the seam better than density alone. Two seams can have a similar stitch count and still behave very differently if one has short, tight stitches and the other has longer, looser ones.
For a pillow cover, the best read comes from both together. Density tells you how crowded the seam is, and length tells you how that crowding is created.
Should I judge the corner the same way as a straight seam?
No, a corner should not be judged the same way as a straight seam. Corners naturally compress stitches and can make the line look tighter or more uneven than the rest of the seam.
Compare a straight section first, then check the corner as a separate clue. If the corner is the only area that looks tight, that may be normal; if the whole seam looks crowded, that is a different sign.
Drafted with AI; not yet reviewed by a person.
About the Author